Burying an olla pot does not require much expertise but I have a few tips that would help alleviate some re-digging efforts. Before you plant your plants, be sure to dig your hole for your olla pots. Trying to insert the pot after you have planted would disturb your plant roots so burying olla pots is great to do right before planting—this can be before the season or when you have just cleaned up your garden bed.
Some olla pots will come with directions from the manufacturers as to the circumference that the water from the pot will reach.
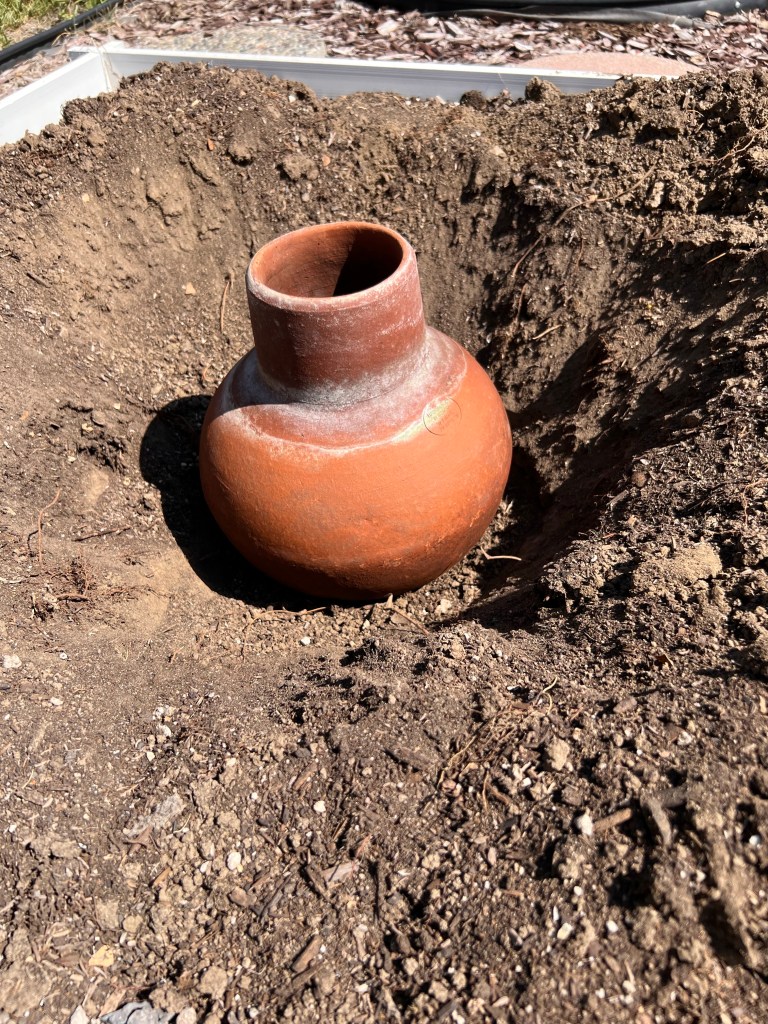
Planting in a 4 x 4 feet raised bed
For my large pot, it suggests about 1.5 feet diameter. This would work perfectly in my 4 by 4 feet square. You will need to dig a hole larger than the size of the olla pot. Digging and inserting the pot in the hole multiple times may be required while you take note of the measurements, placement, and height of your pot. Olla pots can be buried up to the neck, if this is your preference. I have done this and I prefer to leave some space so that when my bed gets flooded, there will be less of a chance of debris floating into the pot. Leaving space also gives you room to add mulch on top of your garden bed.
To determine the height of the pot, I would suggest using a garden tool and placing it on top of your bed. The height of the pot should approximately equal the height of the tool.

As you place your pot and bury it, I recommend pouring water into the pot. Let the pot sit for half and hour to an hour in this condition. This is to check for any holes or cracks in your pot and for the clay to become acclimated to the temperatures. I then gently use my hands to move the soil to bury the pot. You may use a tool if you like but it can quickly be done with your hands and also you’ll have less risk of accidentally striking the pot with your tool.
When the manufacturers recommend the circumference distance, it is fairly accurate so take note that the items at the farthest edges may require more water than the area closest to the neck. This seems to be more important during the young stages of the plant life. As the plant becomes older and the roots deeper, I notice that this doesn’t seem to be much of an issue.
Planting in a standing raised bed
For my standing raised bed, it is suggested that the circumference is about 20″ using the small olla pots. I noted that the bed size is 18” by 32”, much longer than the watering can reach. Two small olla pots are needed to water. Two pots should be more than sufficient and also, having more water should probably make lettuces quite happy.

Following the instructions above, you can then bury your small olla pots. I don’t seem to have much of a drainage and debris issue with the raised standing beds so it is not necessary to leave space at the neck. I would just bury the pots up to the neck.
Should you have garden beds that is not within a garden box but in a more naturalistic setting, just keep the watering circumference measurements in mind and stagger the pots in between your plants. And don’t forget, you can use your olla pots in grow bags and for container gardening.
If you live in an area where you get frost in the winter, you should dig up your clay pots and store them away so they don’t crack under cold temperatures. Otherwise, as a Southern California gardener at the valley basin, I leave my pots in the ground at all times. And if you don’t like where you placed your pots or how deep you have them, you can always just dig them right up and bury them again!
